Dried Flowers
Who doesn’t love flowers? There’s nothing I love more than wandering around one of our neighborhood farms or gardens mid-summer and admiring the pops of color and intricate details of the different flower varieties. But those days seem far away when fall and winter roll around. Luckily, there’s a way to have gorgeous flowers year-round - and it doesn’t involve shipping them across the world! There are plenty of flowers that you can grow yourself or find on our farms (if you’re lucky enough to have a CSA here!) that will preserve in almost perfect condition and fill your home with color.
Flower Varieties
There are many flowers that function as both cut (aka fresh) flowers and dried flowers. Here are some of my favorites, many of which we grow at our neighborhood farms. You can find almost all of these seeds at Johnny’s Seeds, which we use because they are bred in a climate similar to our own.
Strawflowers are an iconic drying flower because they hold their shape and color through the drying process. You can see the similarity in the photos below of both fresh (two left-most) and dried (two right-most) strawflowers. They come in many different colors and the plants are prolific producers, especially if you harvest consistently from them.


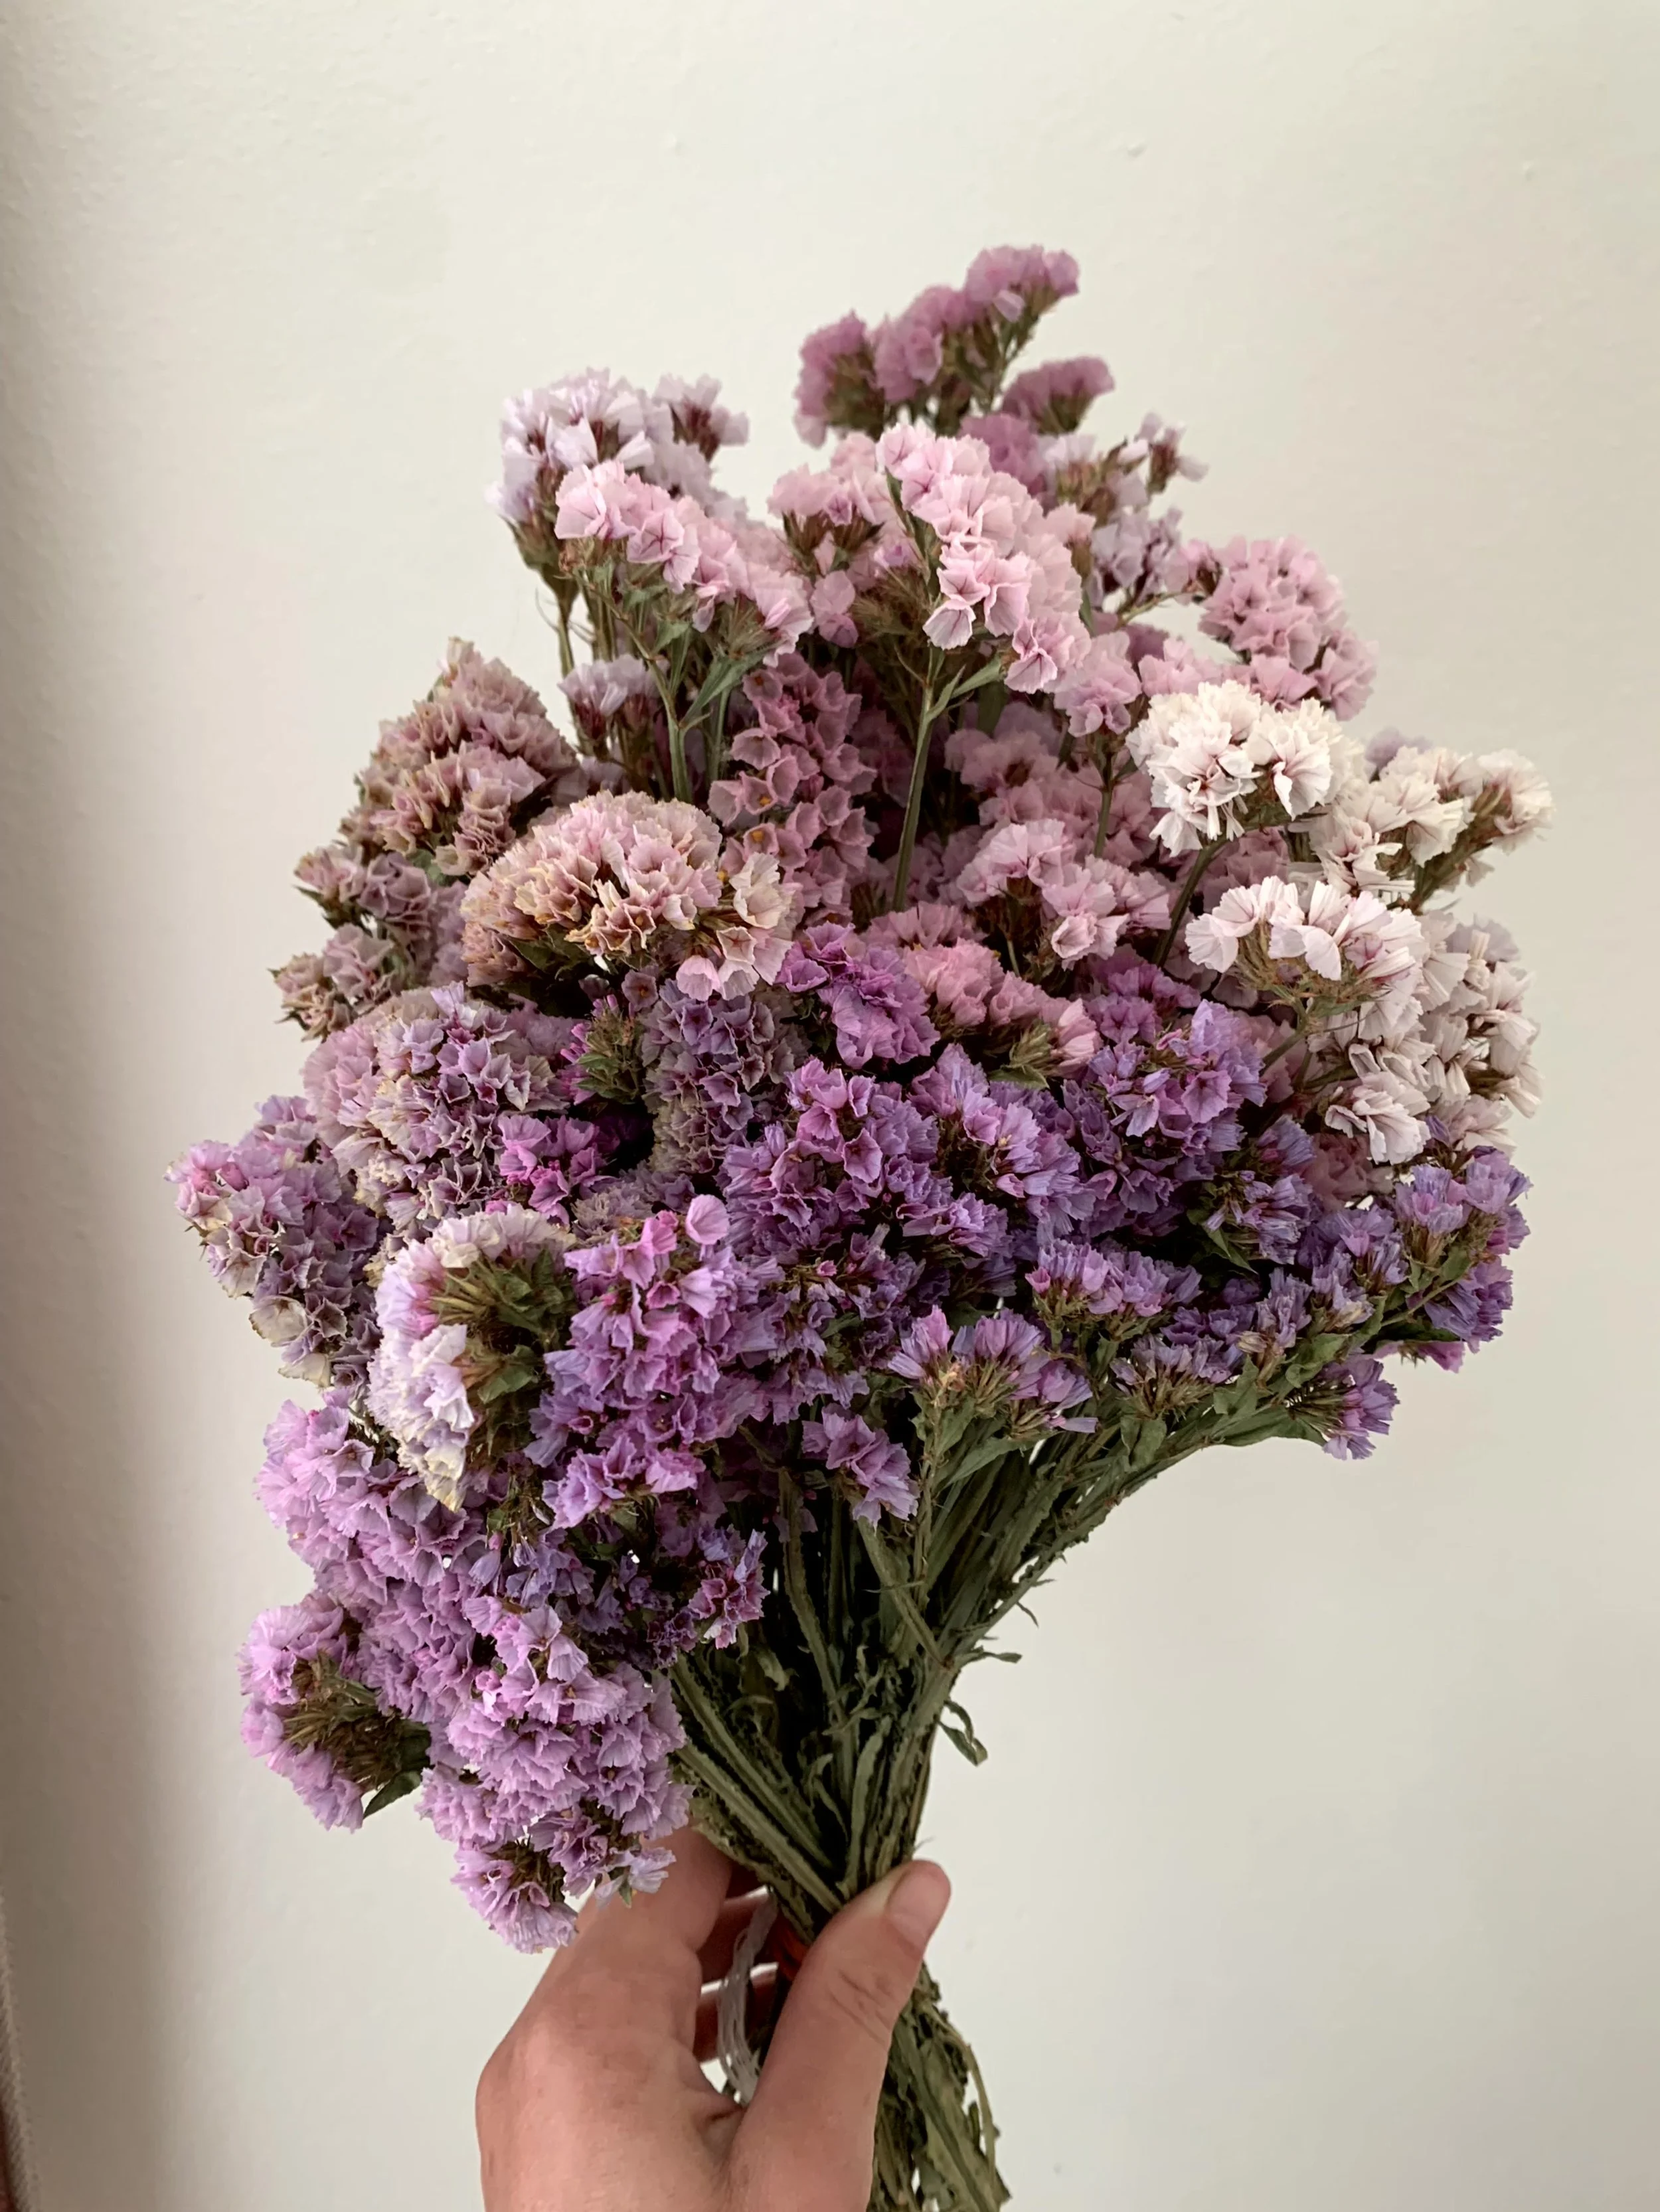
Statice is another classic drying flower that looks nearly identical fresh (left and center) or dried (right). Its unusual shape and texture makes it a great addition to any dried arrangement! It also comes in a wide variety of colors.


Amaranth comes in many shapes, sizes, and colors - two photos below on the left are gomphrena, or globe amaranth, which are an excellent way to add some bright pops of color to your arrangements. Other types of amaranth, ranging from green to dark red to pink to brown, have a spikier shape or a trailing/cascading shape (see the two photos on the right). All these varieties also look excellent in fresh bouquets as well as dried.


Who says we’re limited to flowers when it comes to drying? There are many types of ornamental grasses that give you interesting textural options. Pictured below from left to right are Feathertop, Green Drops, Quaking, and Frosted Explosion grasses (all varieties from Johnny’s Seeds).


Seed pods can also add an interesting element to dried arrangements. Some seed pods I enjoy using are nigella (often called love-in-a-mist) and poppy. Pictured below on the left is a nigella flower in bloom, which is quite beautiful in its own right, and then the fun striped seed pods it produces. Poppy pods are on the right.


Scabiosa, or starflowers, are multi-purpose. They produce gorgeous cut flowers like the one below, and if you let them go to seed, they will create very interesting multi-faceted seed heads.


Here are a few varieties that seem like they’re straight out of a Dr. Seuss book! Craspedia, also known as the drumstick flower, is pictured below on the left. These will dry exactly as pictured - with a bright yellow fuzz. Both echinops (center) and sea holly (right) are perennials that will bloom the second year after planting. Echinops (globe thistle) has spikey blue golf ball-sized flowers. Sea holly (Eryngium) has ball-shaped flowers and distinctive pointed leaves.


Celosia (pictured left and center) lose a little of their color as they dry, but are still a good option. They come in a variety of textures and colors. Lavender (right) is well-known as a great drying flower and unlike many of these other options, retains its amazing smell as it dries!


A few other varieties of note: Eucalyptus, Queen Anne’s Lace, and Bells of Ireland are all fun additions to arrangements. Some cut flowers may not necessarily be intended for drying and will shrivel and lose color, but can still be incorporated nonetheless. I encourage you to experiment! I’ve used marigolds, dahlias, roses and sunflowers to great effect. Many native plants also look great in dried arrangements.

Seasonal Care
When can you expect your first blooms? Most of these flower species can be started indoors or in a greenhouse and transplanted out as seedlings. This extra growing time gives the plants a slight head start, and thus more bloom time. However, if you do not have the means to start them inside, many can also be direct-seeded as soon as it is warm enough. Check seed packets for more specific instructions. We grow all of our farm flowers in a greenhouse and generally start getting blooms towards the end of July. None of these varieties are cold-hardy, which means they’ll be done with the first frost (the average first frost date in Missoula is September 22nd).
Some varieties, like strawflower or celosia, will produce more flowers the more you cut them. This is because at every leaf junction on the main stem, they branch and create more stems and more flowers. These varieties will benefit from ‘pinching’ early in the season. Pinching refers to cutting off the top of the main stem/flower early in the season in order to encourage the plant to focus on sending out more stems and flowers, rather than starting to develop seeds on the first flowers. The photo on the left shows how to pinch off the very first bloom at the top of the strawflower plant right at a junction. And don’t worry - you can dry and save that first flower, too!


Harvesting and Drying
A good rule of thumb when harvesting flowers is to cut them when they are 1/3 of the way fully opened, though again, you can experiment. Flowers will continue to open in a vase or as they dry. For instance, the strawflowers pictured on the far left can be cut when they have a tightly closed bud - or you can wait and let them open to show their yellow center. The other two photos show statice before it blooms (center) and when it’s ready to harvest (right)!
The easiest way to dry flowers is to cut bundles and hang them. If you’re making large bundles to dry, you’ll want to cut the stems long when you harvest (8-12in). Strip all the leaves off as well, since these will just crumble once they’re dried. You should always hang your flowers upside down while drying. If you leave them right-side up, they will droop as they dry and get stuck in that position! Drying upside-down creates a stiff, straight stem that gives you more to work with when you’re arranging later. If you’re going to be using only the flower heads and not the stems (like in a wreath), you can cut shorter stems.
I recommend using rubber bands to hold bundles together. Hang in a dry place with good air flow. Photos below show flowers drying in a shed as well as around the house! Even if you don’t use them in arrangements, they make pretty nice decorations. In a few weeks, they will be completely dried out.


Arrangements
So, now you have all these beautiful dried flowers - what to do with them? Whatever your heart desires! You can always let the dried bundle be decoration in and of itself. You can create arrangements in vases, make flower strings or crowns (stringing fresh marigolds in a garland is popular, see below), make into wreaths (my favorite), or weave into garlic braids (check out the incredible arrangements from Field Five flowers). Have fun experimenting and enjoy flowers all year long!


